|
|
 |
| DR8 |
|
|
|
How to open a .csv fileThe file extension .csv stands for "comma separated value." CSV files are long text lists of numbers where each data entry is separated by a comma (,). SkyServer's Online Notebook and SQL Search tool both allow you to save your search results as .csv files. Opening a .csv file is similar to opening a normal Excel file. Click the Open File button (or select Open from the File menu). You will probably not see the file listed. Click on the "Files of type" bar and select Text Files. You should now see your .csv file listed, and you should be able to open it by double-clicking on the file. However, if your file contains SDSS Object IDs (as it will if you saved it from SkyServer's online notebook), then opening the .csv file the normal way will cause the last three digits of the object ID to be cut off. To open the object IDs correctly, use Excel's "Import Text File" wizard. From the Data menu, select "Get External Data," then "Import Text File." Change "Files of Type" to "All Files," then select the .csv file you want to import. The wizard should look like this: 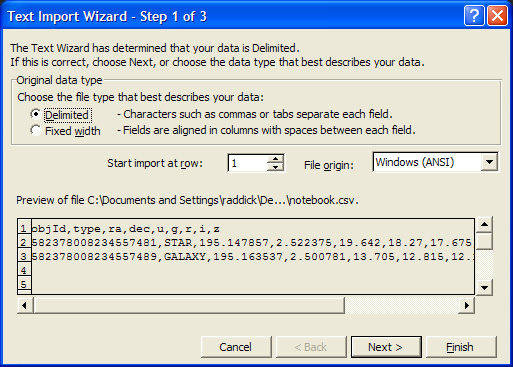
"Delimited" means that data points in your file are separated by specific characters, so that is the right choice. If you are using a Macintosh computer, change File Origin to "Macintosh." If you are using windows, leave it as "Windows (ANSI)." Click Next. The window will now look like this: 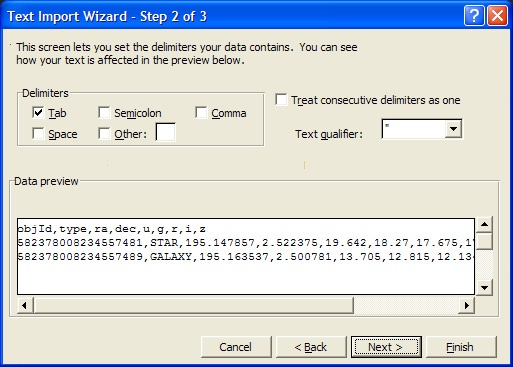
This screen lets you select the character that separates your data points. Uncheck "Tab" and check "Comma." When you select Comma, the preview window below should show your data points divided by vertical lines. Quickly scroll through the data to make sure they are divided correctly. Click Next. The window will now look like this: 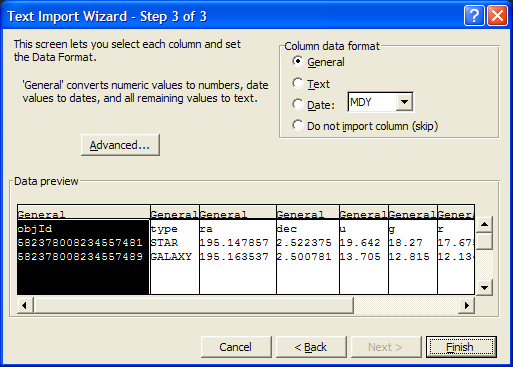
This step allows you to declare what types of data you have. Click on the column that contains the object IDs, then click "Text." Excel will now read that column as a text string rather than a number. Leave the rest of the columns as "General." Click "Finish." Select where you want to paste the data, then click OK. You should now see your data, with the object IDs complete.
|

 |